The Ultimate Guide to Diaper Changing Stations
This post may contain affiliate links that earn commissions (at no cost to you) for qualifying purchases.
Whether you are a new or soon-to-be mommy, or if diapers are already a significant part of your days, let’s talk about diaper changing stations!
It is vitally important that your diapering hub is set up and well-organized. It will be used from day one of your baby’s life, and for years afterward. You always want to know where your next pack of baby wipes is coming from, because you will inevitably run out mid-blowout at 3:00 in the morning, by dim lamplight. *Based on true events, unfortunately.
At the same time, having too many options and too many supplies at hand can be overwhelming and can complicate the whole process. The key is knowing what you need and when, and having a place for everything that is easily accessible. Coming from a mom who has changed literally thousands of diapers, here is my list of dos and don’ts for all things diapers, plus a bonus tip at the end!
Diaper Changing Station Don’ts
1. Don’t: Worry About a Wipe Warmer
In my opinion, it is just another thing to take up space on your changing station, and another item to keep clean. At certain points throughout the winter months when he was a newborn, Levi would seem like he disliked the coolness of the baby wipes, so I started putting a few wipes in my bra at the beginning of each diaper change. They warmed up enough in a minute or two that he seemed to tolerate it much better!
2. Don’t: Spend Money on Specialty Diaper Pail
The cost of baby supplies can add up quickly! One expense you should cross off that list is the specialized trash bags that you need for some of the diaper pails on the market. The Ubbi trash can works just as well to keep odors locked in, and you can use any old trash bag for it!
3. Don’t: Take Up Extra Space with a Diaper Changing Table
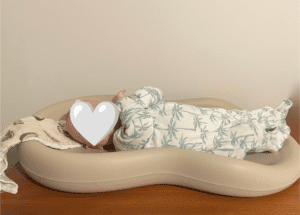
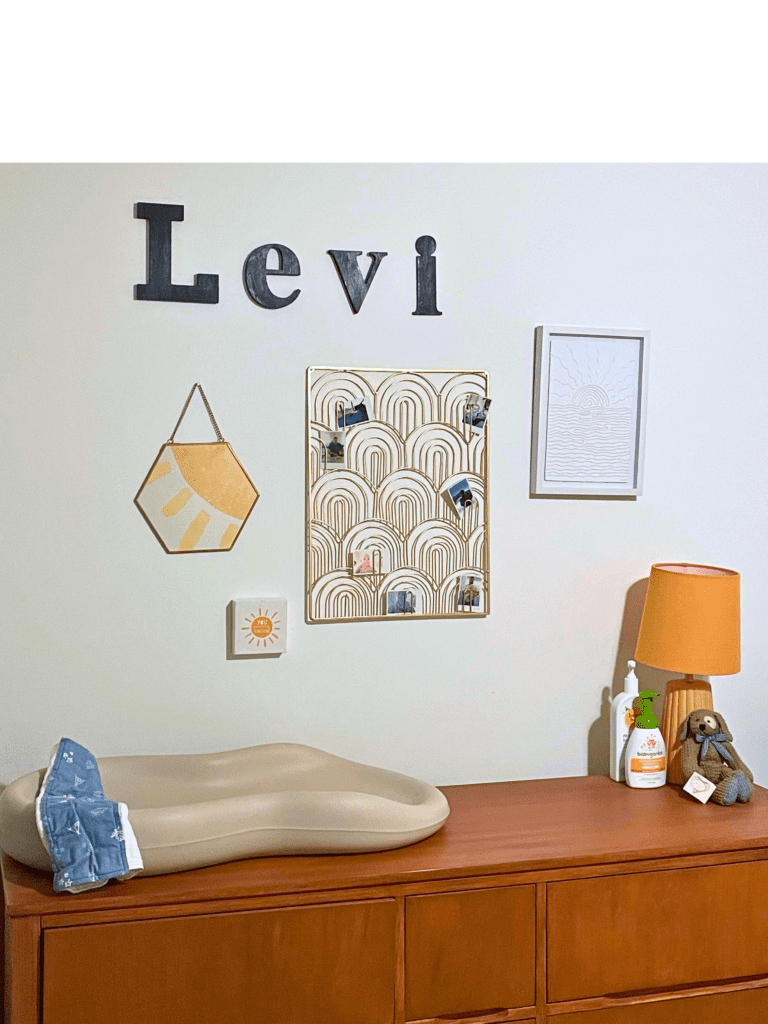
One decision I am so glad I made when designing Levi’s nursery is not including a changing table. His dresser had a decent amount of surface area, and we were able to find an amazing changing table topper to add to it.
When I say that this topper is the absolute best, I mean it is easily in my top three favorite baby products we own. It is comfortable for baby (we sometimes laid a burp cloth down for his head/upper body when he was a newborn for some extra warmth). It is also SO EASY TO CLEAN. It doesn’t need to be laundered when it gets messy; just a quick wipedown and it is good as new. Our pad is over 18 months old and could tell some tales of some of the monstrosities it has seen, but it looks as new as the day I got it.
The beauty of this arrangement also is that when he is potty trained, we can put the topper away and he still has a fully functional piece of furniture, and we don’t have to store a bulky changing table in anticipation for the next baby.
4. Don’t Hang Items Within Reach of the Changing Pad
In my eagerness to decorate Levi’s room before he had arrived, I hung lots of cute things on his walls, including over his dresser/changing pad. This didn’t prove to be an obstacle until he discovered he had hands and started trying to pull it all down.
Learn from me, and don’t let your zeal for a cute nursery blind you to the fact that one day you will have a toddler who will want to pull everything to the ground. Hang items with this in mind!
5. Don’t Use Bright Lights for Late-Night Diaper Changes
I blame my tired, tired, tired new mommy brain for this one, but I would often flip the lights on in his room without thinking when he would wake up in the middle of the night.
Our wakeup routine included a diaper change, a nursing session, a pumping session, swaddling and back to sleep. The lights would only be on for a minute or two during his diaper change, but it eventually occurred to me how much that probably impacted his ability to fall back asleep after eating.
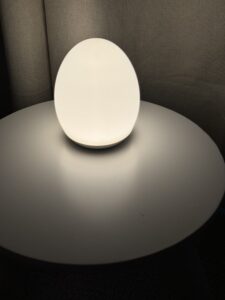
Once we realized our mistake, we switched to this dimmable, rechargeable nightlight. We could bring it from room to room, turn it on and off easily, and maintain a much more peaceful atmosphere. Even now that he is a toddler, we still use it as a nightlight in his room. Alternatively, you could swap the lightbulbs of any lamps you use in the middle of the night to a dimmer wattage.
Diaper Changing Station Dos
1. Do: Have Distractions at the Ready
Have a small stash of toys that are reserved just for diaper time! My son took a while to warm up to diaper changes, especially in the winter when he hated being cold. Having distractions was a game-changer.
For newborns, I would suggest some black and white sensory cards. As my son got bigger, I started giving him easy-to-clean sensory or musical toys if he got fussy. Singing or humming usually bought me some time to get the job done as well.
Now as a toddler, Levi knows the drill when it comes to diaper changes, but still has his squirrely moments, so I have a little stash of entertainment nearby. This stash currently includes a board book, a popper sensory toy, and photos of some family members.
2. Do: Be Prepared for Diaper Changes on the Go
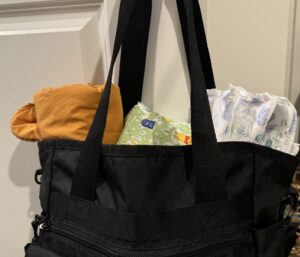
It is absolutely essential to have a diaper changing station set up in your car. The worst blowout of my son’s life happened in a Walmart parking lot on a very hot day, and if I could only use one word to describe it, that word would be traumatic. Never again would I leave the house without a car fully stocked with all diapering essentials. Check out my guide here!
3. Do: Use a Butt Spatula
A butt spatula is one that pre-baby me would have shaken my head at. But I have thoroughly enjoyed no longer having to wash diaper cream out from under my fingernails. It also spreads the cream quickly and evenly, and has a suction cup on the bottom so it stands upright and doesn’t get diaper cream all over everything you own. The silicone material is also a breeze to clean.
4. Do: Keep Diaper Cream and Supplies Handy
Speaking of diaper cream, I highly recommend having all of your creams and lotions easily accessible. You don’t want to have to hunt for when you need it.
When Levi was a newborn, we had an issue with one specific brand of diapers. It took a bit of trial and error to figure it out, but his diaper rash cleared up immediately after switching brands.
In the meantime, we used Boudreaux’s Butt Paste and it worked like a charm. For general soothing, we love Tubby Todd’s All Over Ointment. We have used it on diaper rash, baby acne, dry skin and so much more. I cannot recommend Tubby Todd enough!
I also recommend having a nice, safe hand sanitizer nearby, like this one from Babyganics. It foams up great and smells like oranges!
5. Do: Be Prepared for Being in the Splash Zone
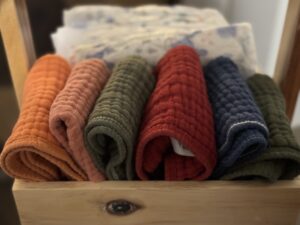
I hate to be the one to break this to you, but you’re going to get peed on. It is an unfortunate truth as you learn your way around a diaper change. I believe the best way to prepare is to always have a stack of nice, absorbent burp cloths near your changing station at all times. They work great for blocking pee, and for cleaning up the mess if you weren’t fast enough.
When Levi was really little, I was once changing his diaper and I noticed my elbow felt a bit damp. Turns out he had peed up my sweater sleeve. It’s gross, but all you can do is be as prepared as possible, and then laugh at the rest.
Bonus Tip: Make Portable Diaper Changing Station
We were gifted a rolling three-tiered cart at our baby shower, and we ended up making a rolling survival kit. One one tier we had diaper supplies, including a changing pad, burp cloths and a change of clothes for the baby. The next tier had my breast pump and all related supplies, like nipple cream. The top tier had snacks and a place for my water, because that breastfeeding thirst was something else. This cart followed me everywhere during my early postpartum days, and made diaper changes possible all over the house.
Create the Diaper Changing Station That Serves You Best
You will spend so much time at the helm of your diaper changing station, and that time is much less chaotic when you are able to create a functional and organized setup. This may vary between families and their different needs, but it’s important to give some thought to what this looks like for you.
I’d love to hear in the comments what works for you if you have an existing diaper changing station that you love!

